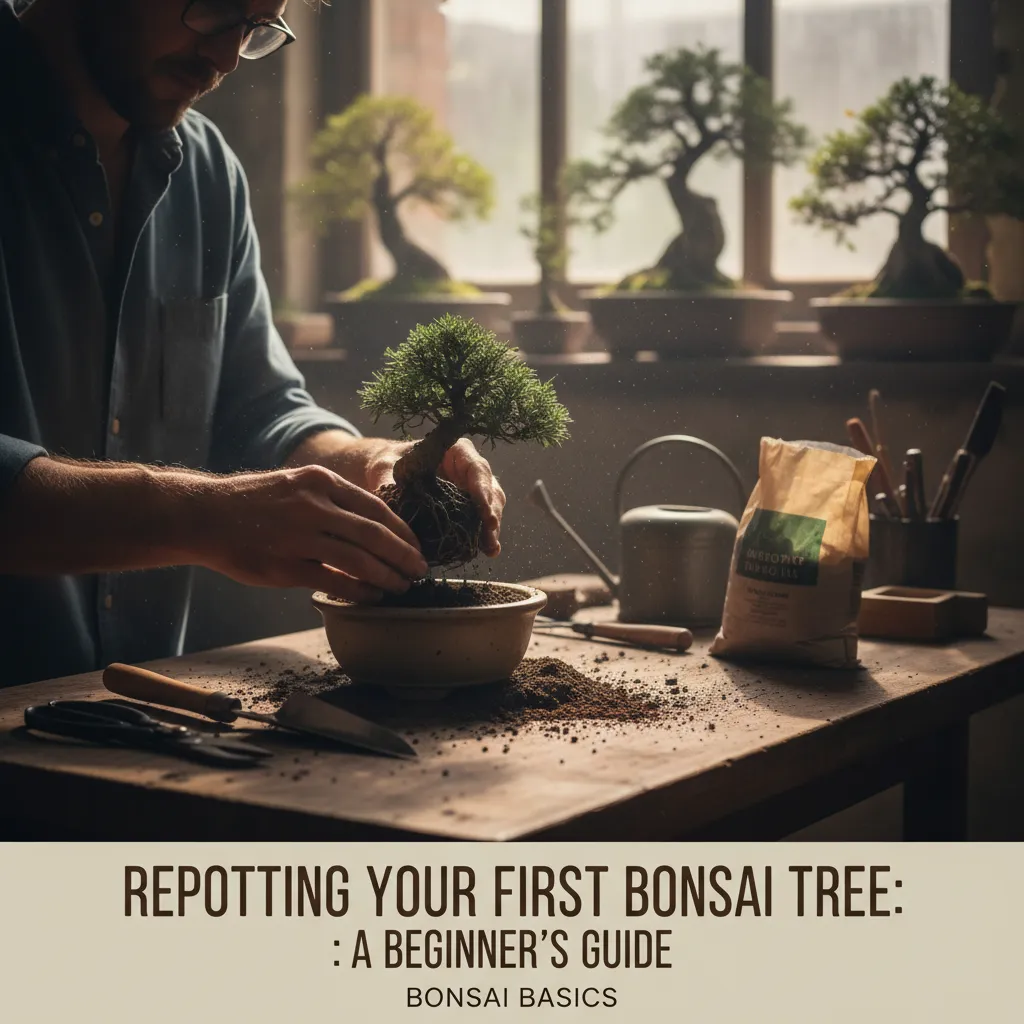
Repotting Your First Bonsai Tree: A Beginner’s Guide
bonzai.co.nz
Repotting a beginner bonsai involves carefully removing the tree from its pot, gently pruning its root system, and placing it into fresh soil in the same or a slightly larger container. This process is vital for providing new nutrients, preventing root bound conditions, and encouraging healthy growth.
Your bonsai tree is a living work of art, and like any living thing, it needs proper care to thrive. One of the most important aspects of this care is repotting. This guide will walk you through the process of repotting your beginner bonsai, ensuring it stays healthy and vibrant for years to come. Understanding when and how to refresh its environment is key to its long-term vitality.
Many new bonsai enthusiasts might feel nervous about this step. However, with the right knowledge and tools, it’s a straightforward process that greatly benefits your tree’s health. We’ll cover everything from recognizing the signs that your bonsai needs a new home to performing the repotting with confidence.
When to Repot Your Beginner Bonsai
Knowing the right time to repot is crucial for your bonsai’s well-being. Repotting at the wrong time can stress the tree and hinder its recovery. Look for specific signs to determine if your tree is ready for this important procedure.
Signs It’s Time for Repotting
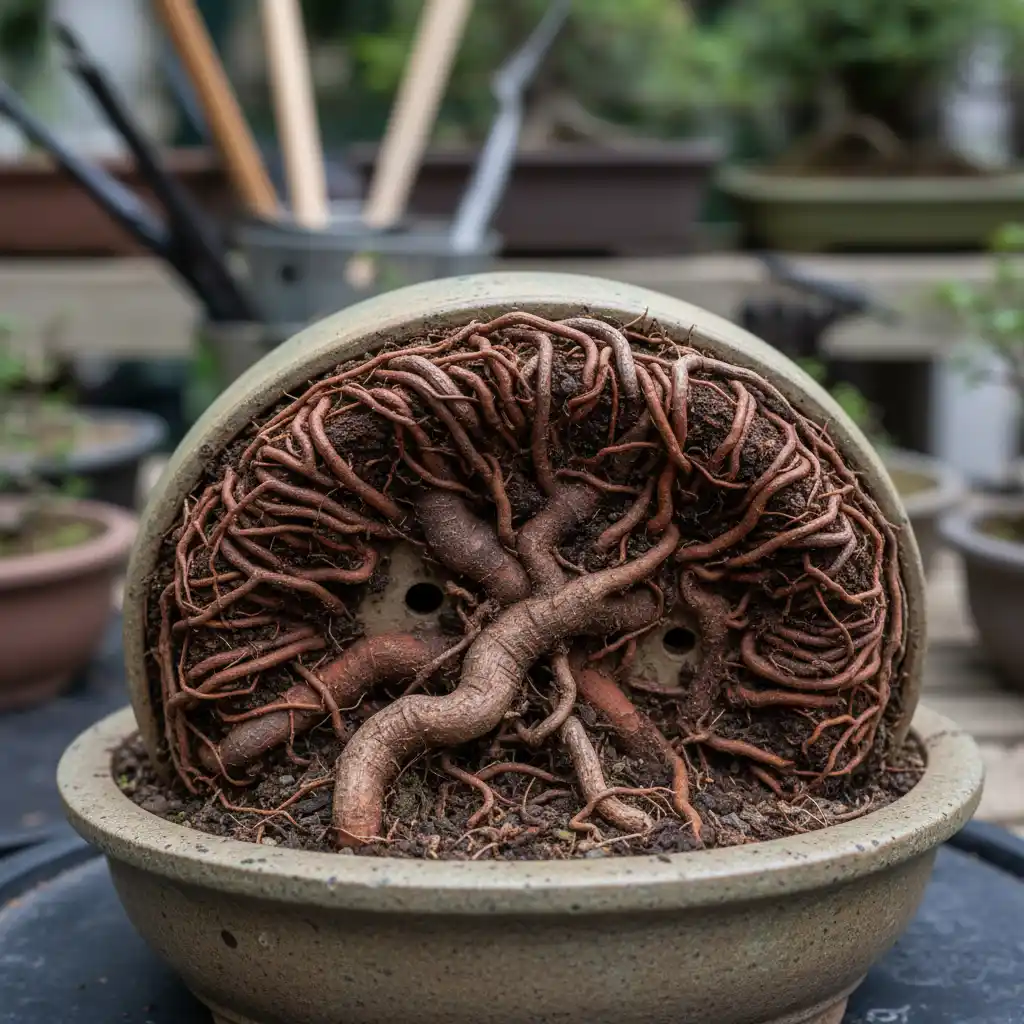
- Roots Circling the Pot: If you see roots growing out of the drainage holes or tightly circling the inside of the pot when you gently lift the tree, it’s a clear sign. This means the root system has filled the available space.
- Slowed Growth: A healthy bonsai should show consistent new growth during its growing season. If growth has noticeably slowed or stopped without an apparent reason, a root-bound condition might be the culprit.
- Poor Drainage: When water sits on the surface of the soil for too long after watering, or drains very slowly, it indicates the soil has compacted. This reduces air circulation to the roots and impedes nutrient uptake.
- General Decline: Yellowing leaves, wilting, or a general lack of vigor can also suggest that the tree’s root system is unhealthy or has exhausted its soil nutrients.
The Best Season to Repot
The ideal time for repotting a beginner bonsai is usually in early spring. This is just before the tree enters its most active growth phase. Repotting during this period allows the tree to quickly recover from the stress of root pruning and establish new feeder roots rapidly. Deciduous trees are often best repotted when their buds begin to swell. For comprehensive guidance on this vital seasonal task, explore Spring Care for Bonsai SH.
Evergreen species can also benefit from early spring repotting. However, some species, particularly tropical ones, might tolerate repotting outside of this window if kept in a controlled environment. Always research your specific bonsai species for precise recommendations, such as those found in Caring for Juniper Bonsai: A Comprehensive Guide. For those interested in the local context, delve into the History of Bonsai in NZ: From Early Imports to Native Excellence. This rich local tradition also includes the skilled practice of NZ Yamadori Principles: Ethical Collection & Cultivation of Wild Stock.
Repotting Frequency
The frequency of repotting depends on the age and species of your bonsai. Young, vigorous trees might need repotting every 1-2 years. Older, more mature trees or slower-growing species may only need it every 3-5 years. Faster-growing species like Ficus often require more frequent root pruning.
Essential Tools for Repotting
Having the right tools makes the repotting beginner bonsai process much easier and less stressful for both you and your tree. Here’s what you’ll need:
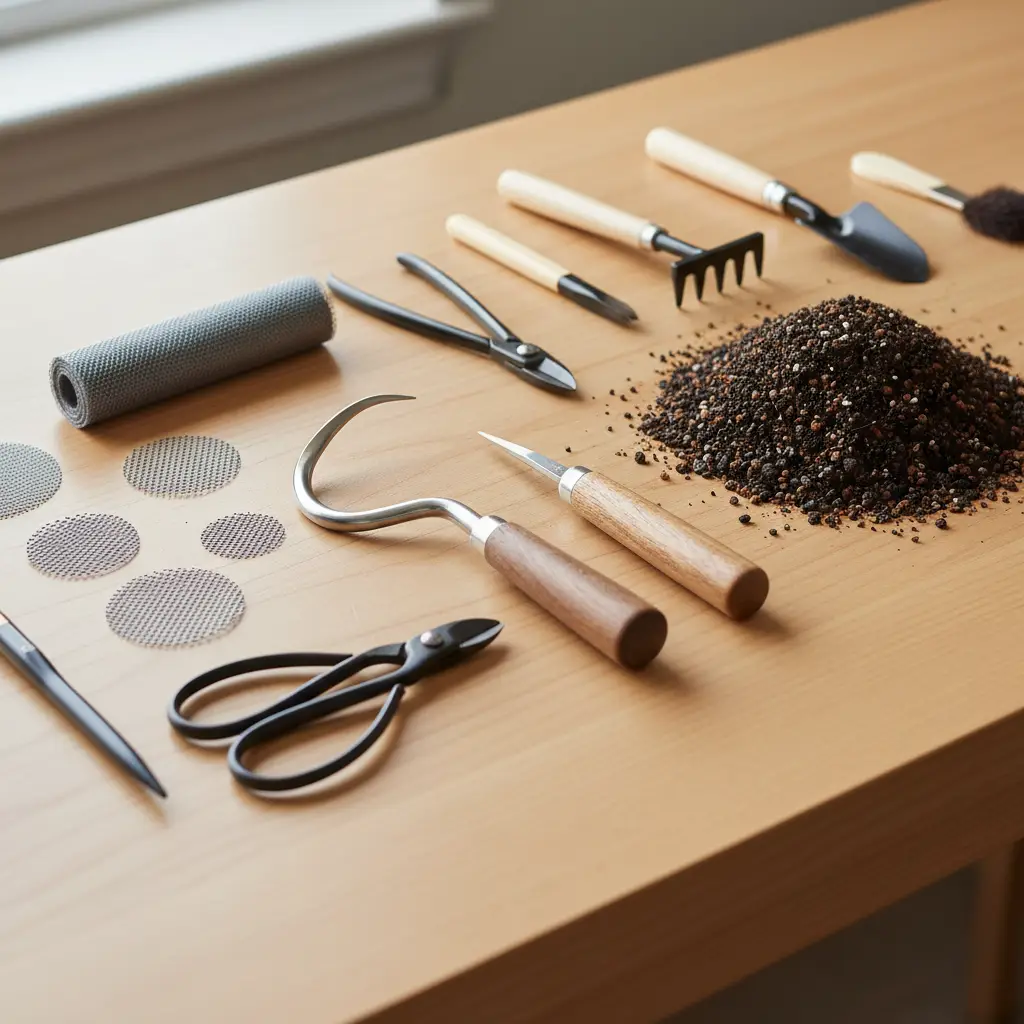
- Root Hook or Chopstick: Used to gently tease out and untangle roots from the root ball.
- Concave Cutters or Sharp Shears: Essential for clean root pruning. A sharp tool minimizes damage and promotes faster healing.
- Bonsai Soil: A specialized mix designed for bonsai, ensuring excellent drainage and aeration while retaining some moisture. It typically contains akadama, pumice, lava rock, and organic components.
- Drainage Mesh: Small pieces of plastic mesh to cover the drainage holes, preventing soil loss while allowing water to escape.
- Bonsai Wire: Used to secure the tree in its new pot after repotting, preventing it from shifting.
- Clean Bonsai Pot: You can reuse the old pot after cleaning, or choose a new one of similar size or slightly larger if the tree has grown considerably.
- Sieve: To sift your bonsai soil and remove fine dust, which can impede drainage.
- Watering Can with Fine Rose: For gentle watering after the repotting process.
Step-by-Step Repotting Process
Follow these steps carefully to ensure a successful repotting of your first bonsai tree. Patience and a gentle touch are key.
1. Preparation
Water your bonsai thoroughly a day or two before repotting. This makes the soil easier to remove and reduces stress on the tree. Gather all your tools and materials in one clean, organized workspace.
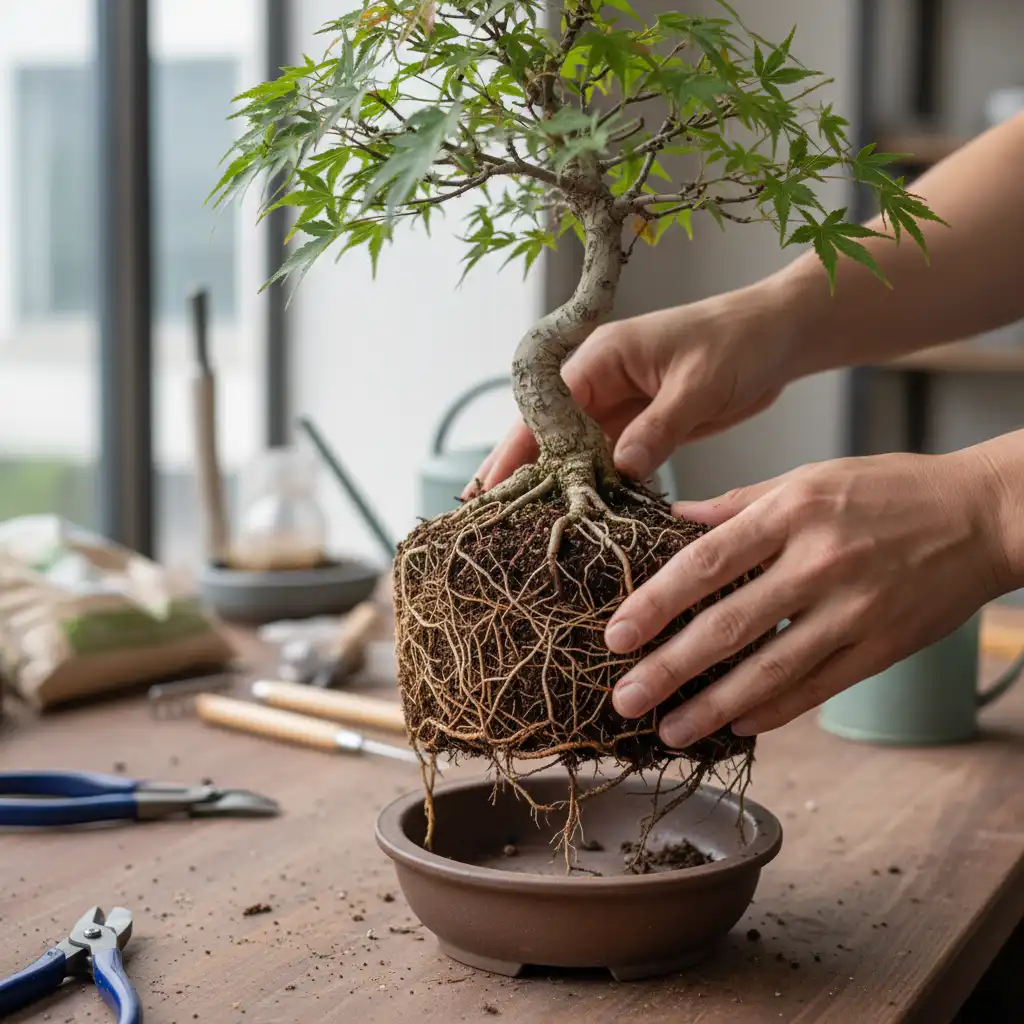
2. Removing the Tree from its Pot
Gently remove the tree from its current pot. If it’s secured with wire, cut the wire first. Use a root hook or spade to carefully loosen the soil around the edges of the pot. Invert the pot and support the soil and root ball, then gently ease the tree out.
3. Root Pruning
This is often the most daunting part of repotting beginner bonsai. Use your root hook to gently tease out the outer layer of roots, working from the bottom upwards. Remove any old, dark, or rotting roots. Prune back approximately one-third to one-half of the total root mass, focusing on thicker, woody roots and those circling the pot. Leave plenty of fine, fibrous feeder roots, as these are vital for nutrient uptake.
The goal is to encourage new, fine root growth closer to the trunk. Avoid cutting the main taproot unless it’s excessively long and you have sufficient fine roots. For more detailed insights into root systems, consider exploring resources like Wikipedia on plant roots. Beyond root work, understanding general pruning and wiring techniques is also crucial for overall bonsai health and aesthetics, particularly for Wiring & Pruning NZ Natives: Shaping for Optimal Health & Aesthetics.
4. Preparing the Pot
If reusing your pot, clean it thoroughly. Place drainage mesh over the drainage holes to prevent soil from washing out. If your pot has anchor wire holes, thread wires through them now. Add a thin layer of fresh bonsai soil to the bottom of the pot, mounding it slightly in the center.
5. Placing the Tree and Adding Soil
Carefully center your bonsai on the mound of soil in the new pot. Adjust the tree’s position until its nebari (surface roots) are at the desired level, typically just above the soil line. If using anchor wires, secure the tree to the pot by twisting the wires firmly but gently. This prevents movement while new roots establish.
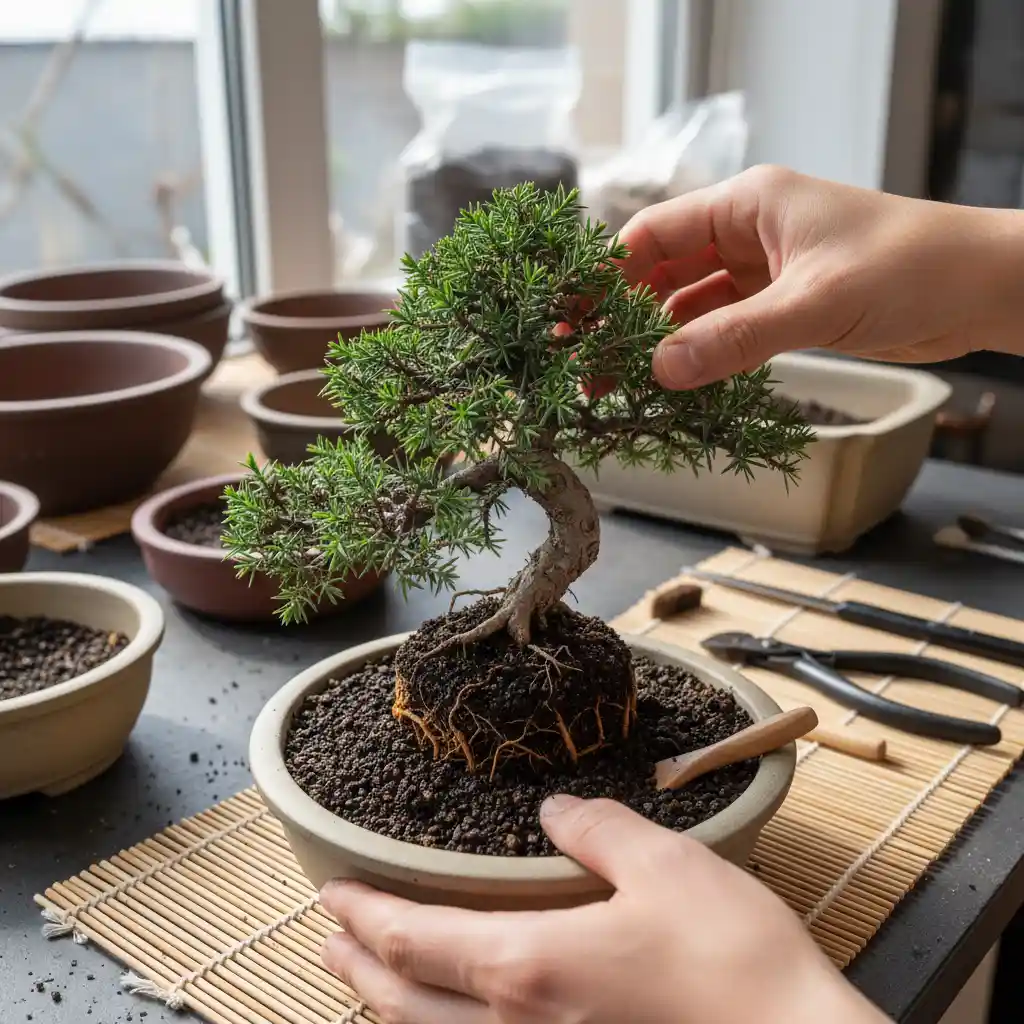
Begin adding fresh bonsai soil around the root ball. Use a chopstick or a thin stick to work the soil into all the gaps and spaces among the roots. Tap the pot gently on your work surface to settle the soil and remove air pockets. Fill the pot to just below the rim.
Post-Repotting Care
The period immediately after repotting is critical for your bonsai’s recovery. Proper care will help your tree heal and establish itself in its new environment.
Initial Watering
Immediately after repotting, water the tree thoroughly. Use a watering can with a fine rose to prevent disturbing the newly placed soil. Water until it drains freely from the bottom of the pot. This helps settle the soil around the roots.
Shade and Protection
Place your repotted bonsai in a shaded or semi-shaded location for several weeks. Protect it from strong winds, direct hot sun, and extreme temperatures. This reduced exposure allows the tree to focus its energy on growing new roots rather than dealing with environmental stress.
Reduced Fertilization
Avoid Bonsai Fertilization Guide: Best Practices & Products your repotted bonsai for at least 4-6 weeks, or until you see clear signs of new growth. The fresh soil provides ample nutrients, and adding more too soon can burn delicate new roots. Once new growth appears, you can resume a diluted feeding schedule. For a comprehensive approach to nourishing your trees, consult the Bonsai Fertilization Guide: Best Practices & Products.
Monitoring for Stress
Keep a close eye on your tree for any signs of stress, such as wilting or yellowing leaves. While some minor stress is normal, prolonged symptoms might indicate issues with watering, root damage, or placement. Maintain consistent but not excessive watering during this recovery period.
Common Mistakes to Avoid
- Over-Pruning Roots: Removing too many roots can severely shock and even kill your tree. Be conservative, especially with your first repotting.
- Using Incorrect Soil: Garden soil or general potting mix does not provide the necessary drainage and aeration for bonsai, leading to root rot. Always use a dedicated bonsai soil mix. For deeper insights into Bonsai Soil, Fertilization & Nutrition, consult expert guides.
- Repotting at the Wrong Time: Repotting during peak summer or winter can be detrimental, as the tree will struggle to recover.
- Immediate Fertilization: As mentioned, wait until the tree shows new growth before feeding it again.
- Not Securing the Tree: A wobbly tree in its pot will struggle to form new root attachments. Always secure it with wire.
By following this guide for repotting a beginner bonsai, you’re setting your tree up for continued success and a long, healthy life. This vital care step ensures your bonsai receives the nutrients and space it needs to flourish. Enjoy the rewarding journey of bonsai cultivation! For those looking to connect with a wider community, exploring Social Media for Bonsai Enthusiasts: Groups & Hashtags can enrich your experience.