How To Wire Totara Bonsai
What You Will Learn
Master the art of wiring Totara bonsai with this expert guide. Learn step-by-step techniques, essential tools, and post-wiring care for stunning results.
How To Wire Totara Bonsai: Sculpting New Zealand’s Native Giant
Are you ready to transform your Totara (Podocarpus totara) into a captivating bonsai masterpiece? Wiring is an indispensable technique in the art of bonsai, allowing you to meticulously shape branches, refine contours, and guide your tree towards its envisioned aesthetic. For enthusiasts of Southern Hemisphere bonsai, mastering how to wire Totara bonsai is a rewarding journey that connects deeply with the unique growth habits of this iconic New Zealand native. This comprehensive guide will walk you through every essential step, empowering you to approach your Totara with confidence and precision.
Table of Contents
Why Wire Totara Bonsai?
Wiring is the primary method for directing the growth of your Totara’s branches and trunk, enabling you to achieve specific bonsai styles and create a sense of age and natural beauty. Unlike some deciduous trees that can be styled through pruning alone, Totara, being an evergreen conifer, often requires the persistent guidance of wire to hold branches in desired positions. The benefits are manifold:
- Structural Development: It allows you to create primary and secondary branch structures that align with traditional bonsai aesthetics.
- Aesthetic Refinement: Introduce curves, cascades, or upright forms that mimic natural growth patterns seen in aged Totara trees.
- Ramification: Encourage finer branch ramification by positioning branches to receive optimal light and air circulation.
- Correction of Flaws: Gently correct awkward angles or unwanted straightness in branches.
“Wiring is not about forcing nature, but about guiding it towards an idealized miniature form, respecting the tree’s natural tendencies while enhancing its beauty.”
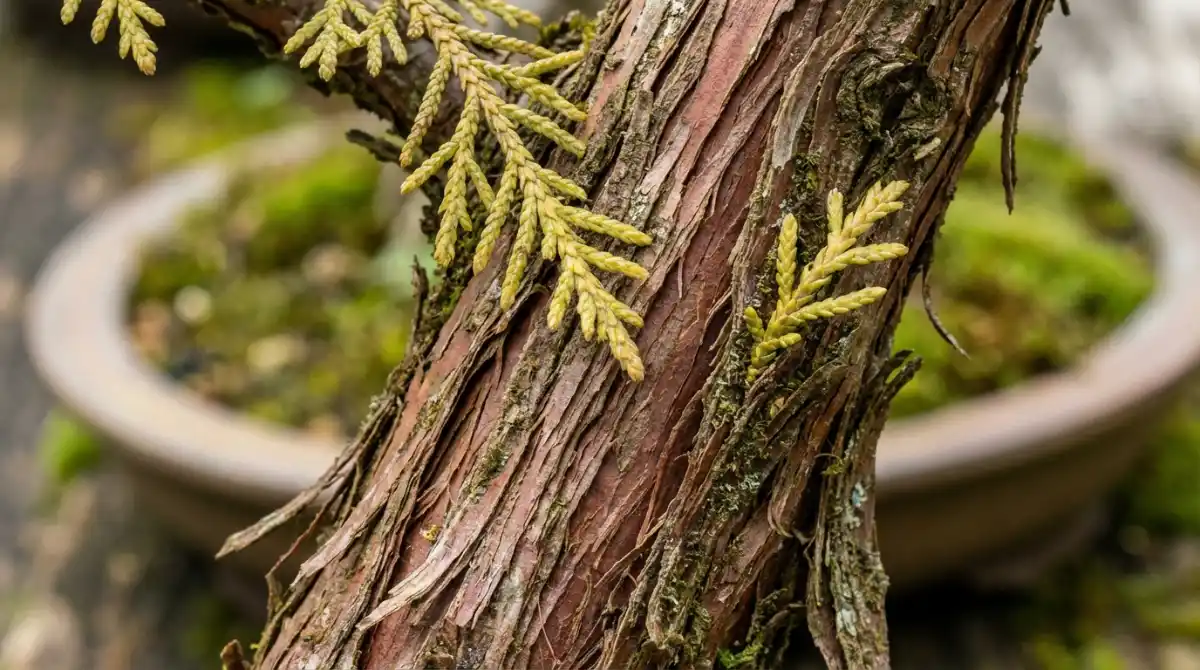
Understanding Totara Characteristics for Wiring
Before you begin to how to wire Totara bonsai, it’s crucial to understand the unique characteristics of Podocarpus totara. To better appreciate its place among other trees, consider our guide on Bonsai Species Comparison for Different Climates. Totara is a robust, long-lived conifer native to New Zealand. Its wood is generally strong and flexible when young, but can become brittle with age. The bark is fibrous and peels in long strips, which means care must be taken to avoid damaging it during wiring.
- Growth Habit: Totara typically has a strong apical dominance, meaning it wants to grow upwards. Wiring helps redirect this energy into lateral growth.
- Flexibility: Younger branches are quite flexible, making them ideal for shaping. Older, thicker branches require more caution and heavier gauge wire, or even guy wires.
- Healing: Totara generally heals well from minor wire marks if the wire is removed promptly. However, deep marks can leave lasting scars, especially on the trunk and primary branches.
- Branch Pads: Its dense foliage lends itself well to creating compact, triangular branch pads, a hallmark of many conifer bonsai styles.
Step-by-Step: How to Wire Your Totara Bonsai
Wiring your Totara bonsai is a meticulous process that requires patience and a gentle touch. Follow these steps for successful shaping.
1. Gather Your Tools and Materials
- Bonsai Wire: Anodized aluminum wire (most common for beginners) or annealed copper wire. Have a range of gauges (1mm to 6mm) available. The wire should be strong enough to hold the branch but not so thick it damages it.
- Wire Cutters: Specifically designed for bonsai wire to make clean cuts without dulling your pruning shears.
- Concave Cutters: For precise pruning of branches if needed.
- Branch Benders (Optional): For thicker, more stubborn branches.
- Raffia or Rubber Strips (Optional): To protect delicate bark on older branches before wiring.
2. Prepare Your Totara
Ensure your Totara is healthy and well-watered before wiring. Avoid wiring a stressed or recently repotted tree. Lightly prune any unwanted growth or excessive foliage that might obstruct your view or impede wire placement. The best time to wire Totara is typically during its dormant season or when growth has slowed, allowing the wire to set the branch’s position before vigorous growth begins.
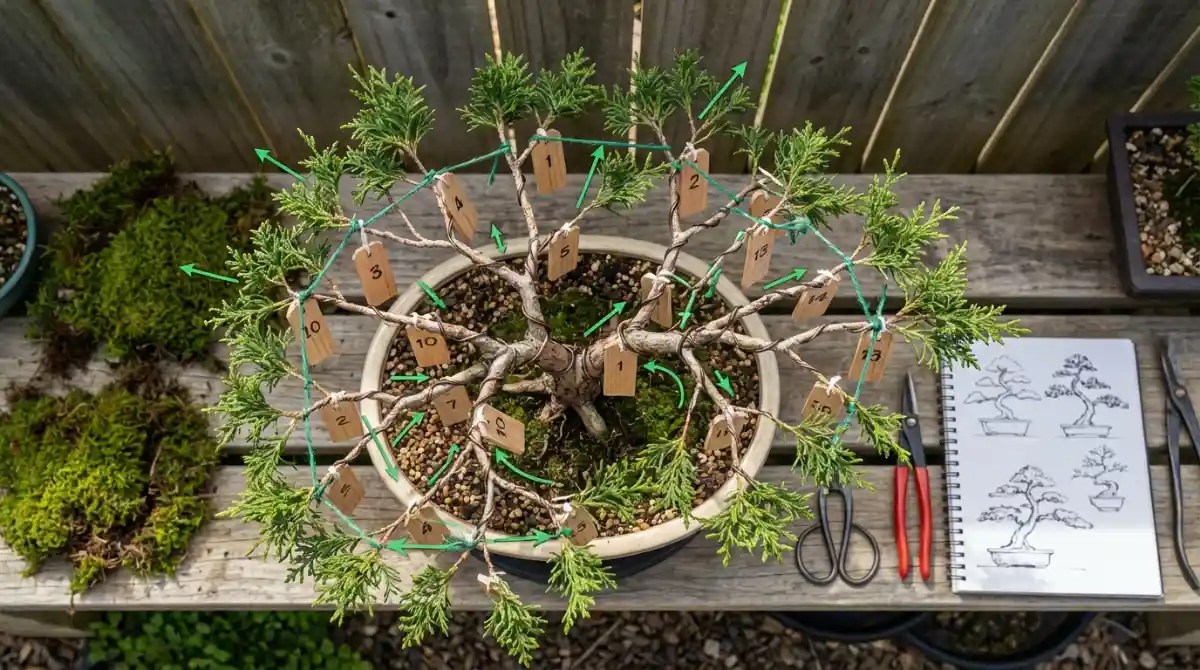
3. Plan Your Design and Branch Placement
Visualize the desired outcome. Consider the overall style, the placement of primary and secondary branches, and how light will penetrate the foliage. Identify which branches need wiring and what gauge of wire each will require. A good rule of thumb is that the wire should be approximately one-third the thickness of the branch it is wiring.
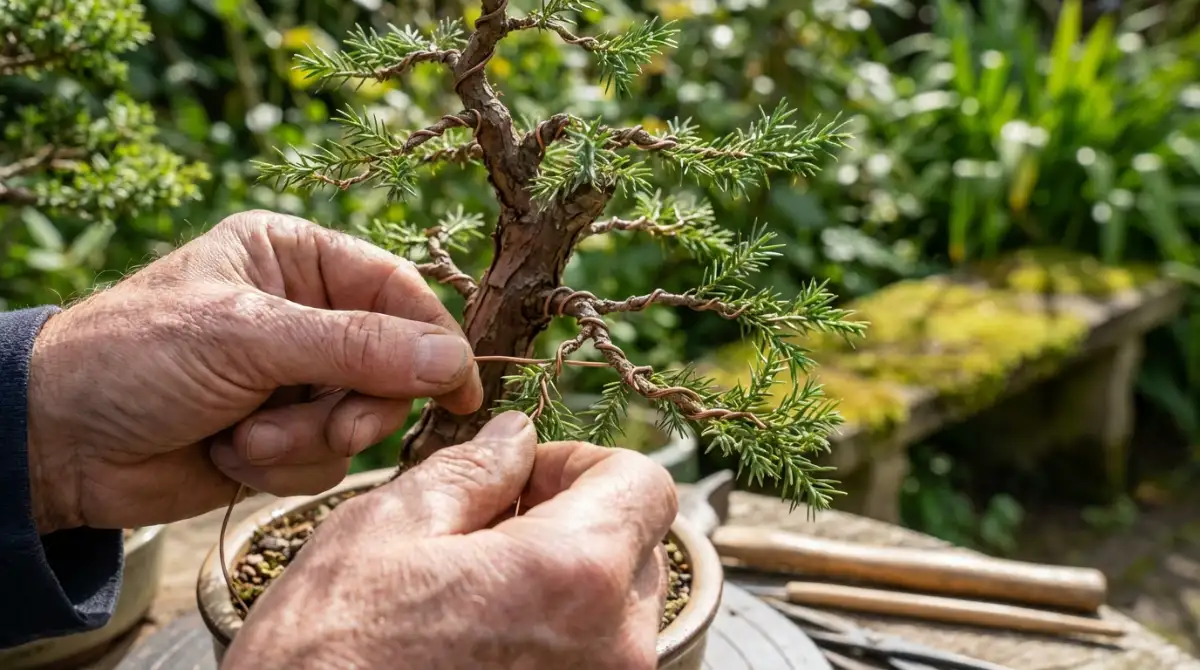
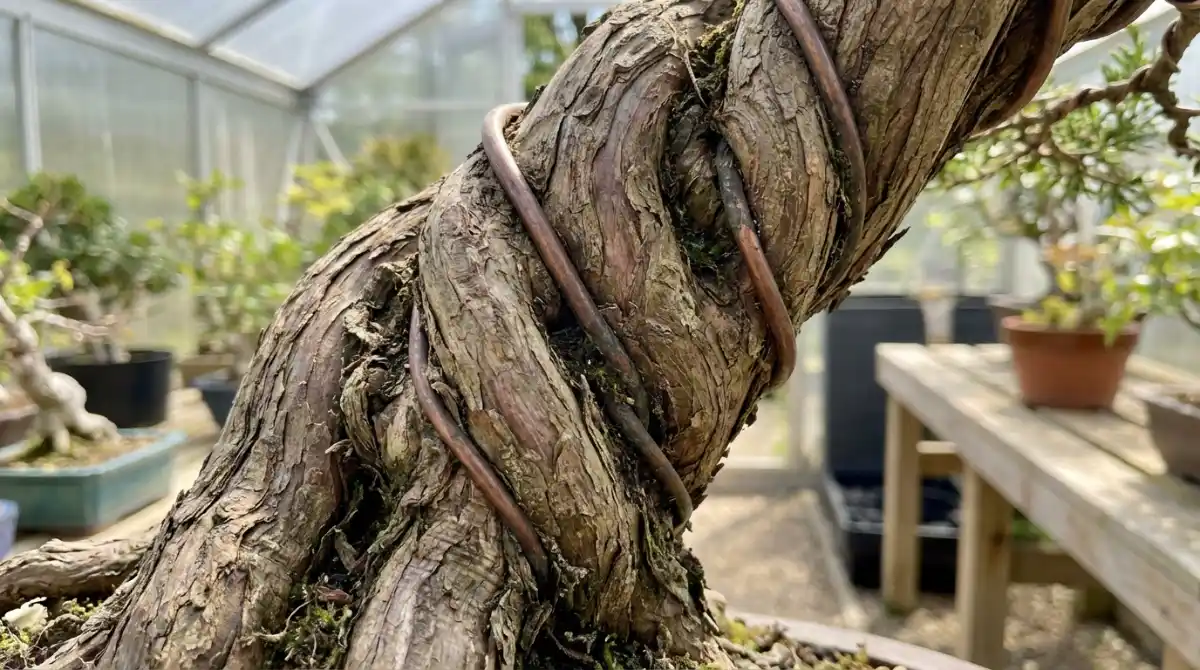
4. Apply the Wire
Start with the trunk or the thickest branches first, working your way to finer branches. The goal is to anchor the wire securely without girdling the bark. There are two main methods:
- Single Wire: Anchor one end of the wire into the soil or around a strong, stable branch/trunk. Wrap it around the branch at a 45-degree angle.
- Double Wire: Use one piece of wire to wire two adjacent branches of similar thickness. Anchor the wire securely around the trunk or a strong branch between them, then wrap each end around its respective branch.
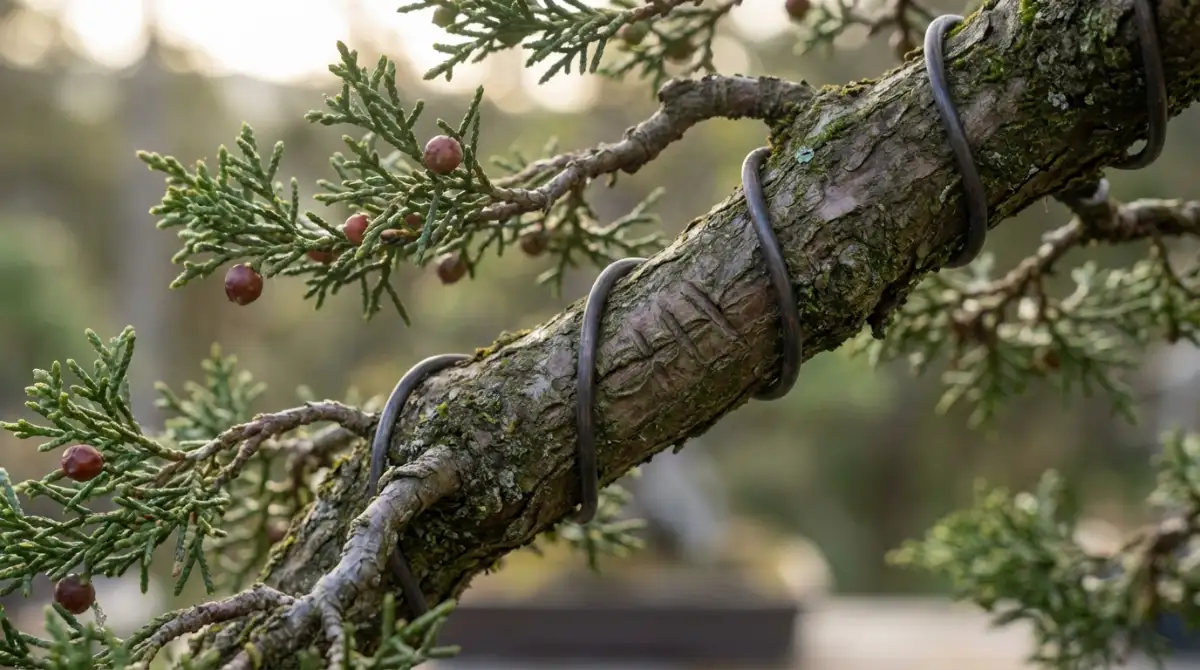
Ensure the wire coils are snug and evenly spaced, avoiding overlapping or crossing. The wire should provide firm support but not be so tight it immediately digs into the bark. If necessary, wrap older, more delicate branches with raffia or rubber strips for protection before applying the wire.
5. Shape and Position
Once wired, gently bend the branch into the desired position. Use your thumbs to support the inside of the bend and your fingers to guide the outside, minimizing stress on the branch. Make gradual bends; sudden, sharp movements can cause snapping. For Totara, aim for natural, sweeping curves rather than abrupt angles.
6. Monitor and Remove
This is perhaps the most critical step in how to wire Totara bonsai. Totara can grow vigorously, especially during spring and summer, causing the wire to cut into the bark. Check your wired branches weekly for signs of constriction. As soon as you see the wire starting to bite into the bark, it’s time to remove it. This could be anywhere from a few weeks to several months, depending on growth rate and wire gauge. Always use wire cutters to carefully snip each coil, unwrapping it in the reverse direction of application. Never pull the wire off, as this can severely damage the bark and underlying cambium.
Post-Wiring Care and Maintenance
After successfully wiring and shaping your Totara, ongoing care is vital for its health and the retention of its new form.
- Watering: Continue regular watering, ensuring the soil remains consistently moist but not waterlogged. For specific seasonal considerations, including detailed advice on Spring Care for Bonsai SH, ensure your care regimen aligns with the tree’s needs.
- Fertilization: Resume a balanced fertilization schedule to support new growth, but avoid over-fertilizing immediately after significant wiring, especially if the tree experienced stress. For an in-depth look at optimal nutrient delivery, consider our guide on Soil & Fertilization for NZ Native Bonsai: Custom Blends & Feeding.
- Protection: Protect your newly wired Totara from strong winds or heavy rain that could shift branches or cause damage before they set.
- Observation: Continue to observe the branches. Sometimes, they may spring back slightly after wire removal. If this happens, reapply wire for a shorter period or use a different technique like guy wires.
Common Mistakes to Avoid When Wiring Totara
- Using the Wrong Wire Gauge: Too thin, and it won’t hold; too thick, and it’s hard to apply and can damage the branch.
- Improper Wire Angle: Not applying at a 45-degree angle reduces holding power.
- Over-tightening: Leads to immediate girdling and scarring.
- Leaving Wire on Too Long: The most common mistake, resulting in deep, unsightly scars that can take years to fade or remain permanent.
- Wiring a Sick Tree: Always ensure your Totara is vigorous and healthy before undergoing the stress of wiring.
- Bending Too Forcefully: Totara branches can snap if bent too aggressively, especially older wood.
Conclusion
Mastering how to wire Totara bonsai is an essential skill for anyone serious about styling these magnificent Southern Hemisphere trees. By understanding Totara’s unique characteristics, gathering the right tools, and meticulously following each step, you can guide your tree’s growth with precision and artistry. Remember, patience and regular observation are your greatest allies in preventing damage and achieving the desired aesthetic. With practice, your Totara will evolve into a stunning representation of natural beauty, a testament to both its resilience and your dedication as a bonsai artist. To further connect with the global community and share your journey, explore Social Media for Bonsai Enthusiasts: Groups & Hashtags and consider Finding Bonsai Mentors & Clubs in NZ: Connect with Your Community.
FAQ About Wiring Totara Bonsai
-
Can I wire Totara bonsai at any time of year?
While Totara can generally be wired outside of extreme temperatures, the dormant season or periods of slower growth are often preferred. This allows the branches to set in their new position before a flush of vigorous growth causes the wire to cut in quickly.
-
How do I choose the correct wire gauge for Totara branches?
A good rule of thumb is to use wire that is approximately one-third the thickness of the branch you are wiring. You should also be able to wrap it around the branch 1.5 to 2 times without it feeling too loose or too tight.
-
What if I accidentally damage the bark during wiring?
Minor scrapes usually heal over time. For deeper damage, you can apply a bonsai cut paste to protect the wound and encourage healing. Be more careful next time, and consider using raffia for protection on sensitive areas.
-
How long should wire stay on a Totara bonsai?
This varies greatly depending on the branch’s vigor, growth rate, and the wire gauge. It can be anywhere from a few weeks to several months. The most important thing is to check weekly and remove the wire as soon as it begins to bite into the bark.
-
Can I re-wire a Totara branch if it springs back after wire removal?
Yes, you can re-wire a branch if it hasn’t held its position. Often, a second, shorter period of wiring will be enough to set the branch. Alternatively, for very stubborn branches, guy wires can be used, anchoring a branch to the pot or another strong branch.
References/Sources
- Bonsai Empire. (n.d.). Bonsai Wiring Techniques. Retrieved from https://www.bonsaiempire.com/basics/bonsai-care-techniques/wiring-bonsai
- National Bonsai Foundation. (n.d.). Basic Bonsai Techniques: Wiring. Retrieved from https://www.bonsai-nbf.org/bonsai-techniques/wiring/
- New Zealand Plant Conservation Network. (n.d.). Podocarpus totara. Retrieved from https://www.nzpcn.org.nz/flora/species/podocarpus-totara/
- The Art of Bonsai Project. (n.d.). Conifer Bonsai Care. Retrieved from https://artofbonsai.org/care/conifers.php