Bonsai Wiring Techniques: Your Step-by-Step Bonsai Wiring Guide
Master the art of shaping your bonsai with our comprehensive step-by-step bonsai wiring guide. Discover essential techniques for stunning results.
Bonsai wiring is a fundamental technique for shaping these miniature trees. It allows you to guide branches and trunks into desired positions, creating the iconic artistic forms we admire. Without proper wiring, many bonsai styles would be impossible to achieve.
This detailed bonsai wiring guide will walk you through everything you need to know, from basic principles to advanced application and removal. Whether you’re a beginner or looking to refine your skills, understanding these steps is crucial for successful bonsai cultivation. For comprehensive health and development, don’t forget the importance of Bonsai Soil, Fertilization & Nutrition in nurturing your tree, and equally vital is Choosing Bonsai Pots for NZ Natives: Function & Form for aesthetic presentation and root health. Beyond these, mastering Basic Bonsai Watering Techniques and implementing Natural Pest Control for Bonsai Trees are also crucial for overall tree vitality and preventing damage.
Table of Contents
Understanding Basic Bonsai Wiring Principles
Before you even pick up a roll of wire, it’s essential to grasp the core concepts behind bonsai wiring. This knowledge forms the foundation for effective and safe shaping.
Why We Wire Bonsai
Wiring allows us to gently bend and reposition branches and trunks. Trees naturally grow towards light, but with wire, we can create more artistic and compact forms. It’s about working with nature to enhance the tree’s aesthetic appeal.
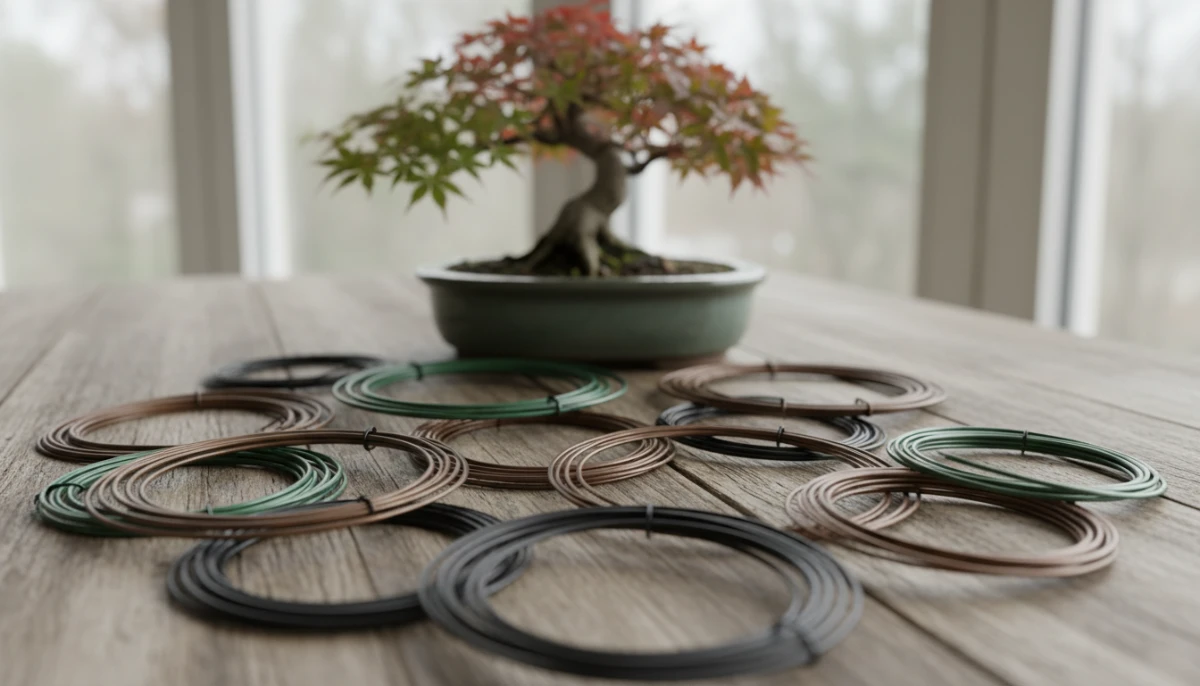
Types of Wire and Tools
Two main types of wire are used: anodized aluminum and annealed copper. Aluminum is softer, easier to work with, and generally preferred by beginners. Copper is stronger, holds its shape better, but requires more skill to apply.
Essential tools include wire cutters, branch cutters, and sometimes concave cutters for removing thicker branches. Always choose the right gauge of wire for the branch you are working on. A good rule of thumb is that the wire should be strong enough to hold the branch in its new position but not so thick that it damages the bark. To delve deeper into your toolkit, explore Professional Bonsai Styling Tools and Their Use.
The Best Time for Wiring
The ideal time to wire depends on the species and climate. Generally, wiring deciduous trees is best done when they are dormant, allowing the wire to stay on longer without growing into the bark. Evergreens can be wired almost anytime, but active growth periods are often avoided to prevent scarring. Understanding these species-specific needs is vital; for instance, mastering Pine Bonsai Care: Needles, Candles & Wiring requires specific considerations unique to pines. For another example of unique challenges and care, consider Kauri Bonsai: Challenges and Long-Term Care of a Majestic Native. If you’re working with specific species, understanding How To Wire Totara Bonsai, for example, can be incredibly beneficial. Similarly, knowing about Repotting Bonsai: When, Why, and How-to is crucial for ensuring healthy root development and overall tree vigor.
Applying Bonsai Wire Correctly
Applying wire is where precision and patience come into play. The goal is to secure the branch without causing damage, allowing it to hold its new shape.
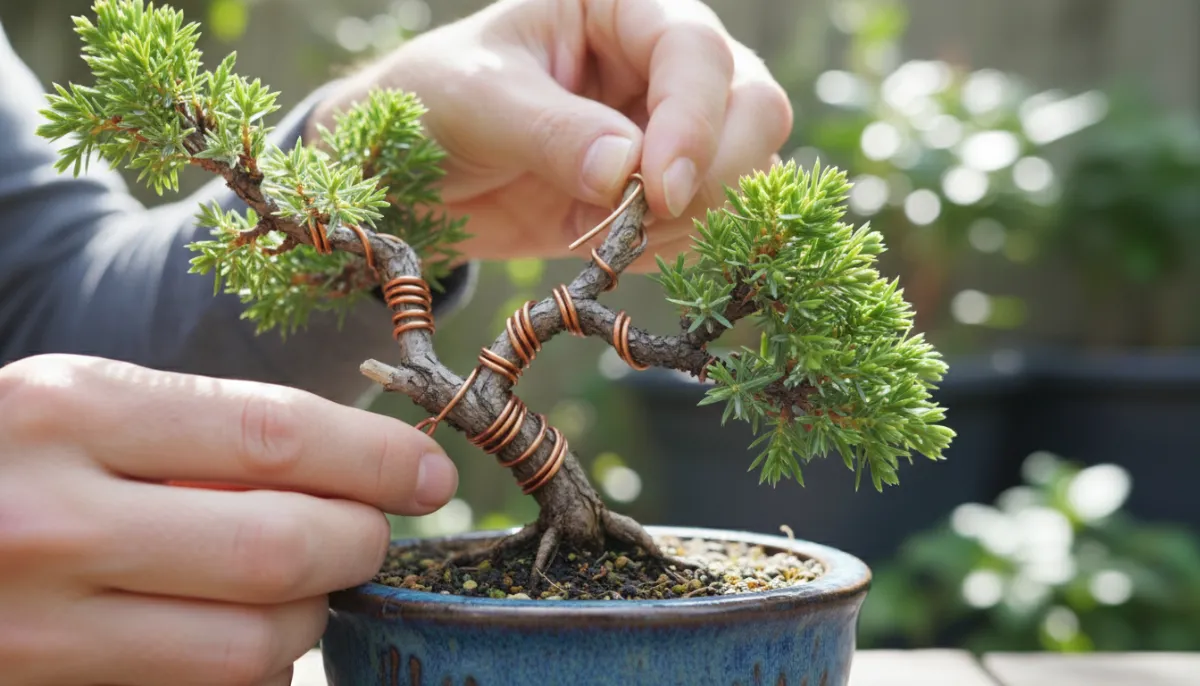
Step-by-Step Wiring Process
- Choose the Right Wire: Select wire that is about one-third the thickness of the branch you intend to bend. It should be strong enough to hold its position.
- Anchor the Wire: Always anchor your wire securely. For a single branch, anchor it to the trunk or a stronger branch. For two branches, use a single piece of wire to anchor between them.
- Wrap at a 45-Degree Angle: Wrap the wire around the branch at a consistent 45-degree angle. This angle provides the best grip and control. Ensure each coil is snug against the previous one, without overlapping or leaving large gaps.
- Support the Branch: While bending, use your thumb and forefinger to support the part of the branch being bent. This prevents splitting or breaking.
- Bend Gradually: Bend the branch slowly and carefully into the desired position. Aim for natural, flowing curves. Avoid sharp, unnatural bends.
- Secure the End: Once the branch is in place, trim any excess wire, leaving a small tail that doesn’t poke out or scratch the bark.
Remember, the wire’s purpose is to hold the branch in its new position until it “sets.” It’s not about forcing an immediate, drastic change.
Common Wiring Mistakes to Avoid
Many beginners make small errors that can affect the health or appearance of their bonsai. Overlapping wires can restrict growth, while wires that are too loose won’t hold the shape. Never wrap too tightly, as this can cut into the bark, causing permanent scars.
Using the wrong gauge wire is another common pitfall. A wire too thin won’t be effective, and one too thick can be difficult to manage and potentially damage the tree.
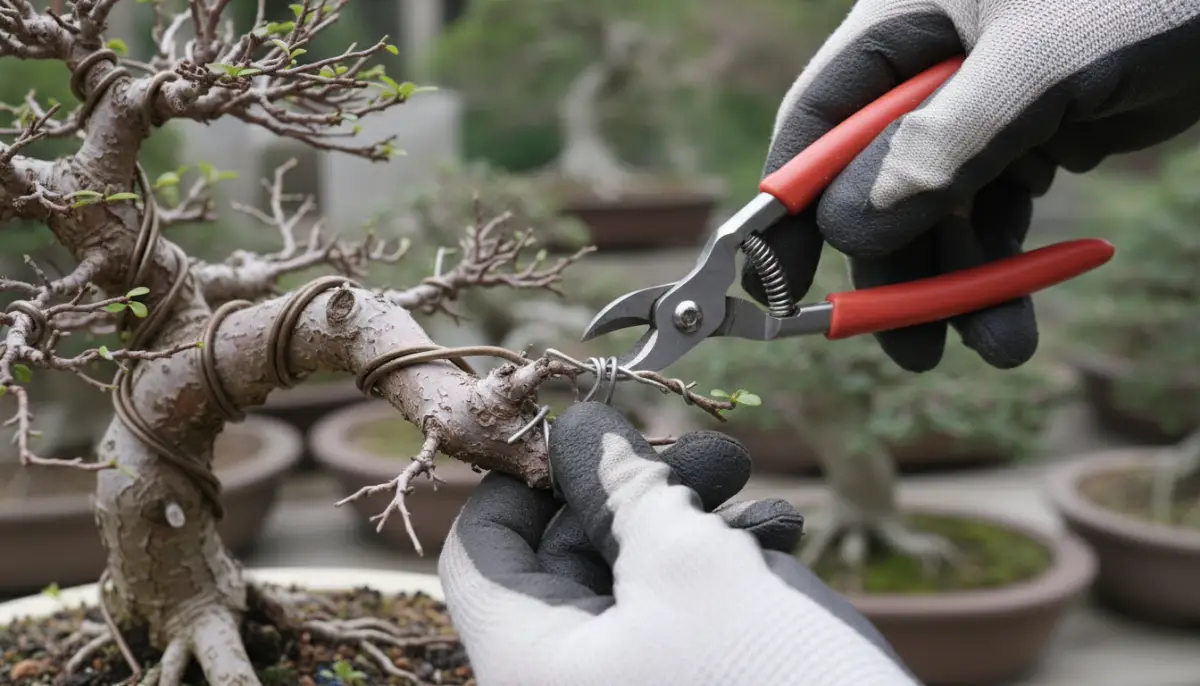
Safely Removing Bonsai Wire
Removing wire is just as important as applying it. Improper removal can undo all your hard work and damage the tree. The timing is crucial.
When to Remove the Wire
The wire should be removed when the branch has “set” in its new position. This can take anywhere from a few months to over a year, depending on the tree species, age, and growth rate. Check your tree frequently, especially during periods of active growth. If you see the wire starting to cut into the bark, it’s definitely time to remove it. For specific needs, such as managing a particular species through colder months, guidance on Jade Bonsai Winter Care can be invaluable. Likewise, understanding proper Spring Care for Bonsai ensures your tree thrives during its most active growth phase.
The Correct Way to Remove Wire
Always cut the wire off, never unwind it. Unwinding can tear the bark, causing significant damage. Use sharp wire cutters and cut each coil individually. Start from the anchoring point and work your way outwards. Be extra careful not to nick the bark or buds.
If the wire has begun to embed, cut it in several places along the length of the branch and gently tease out the pieces. Patience is key here. If a piece is deeply embedded, it’s sometimes better to leave it and let the tree grow over it rather than risking a major wound. Over time, the tree might naturally push it out or grow around it.
After removal, keep an eye on the branch to ensure it holds its shape. If it springs back, you might need to re-wire it for a shorter period.
For more detailed information on specific species and techniques, you can consult reliable sources like Wikipedia.
Advanced Tips for Bonsai Wiring
Once you’ve mastered the basics, you might want to explore more complex wiring techniques to achieve even more sophisticated forms in your bonsai. While wiring is crucial for directing growth, it’s also complemented by other techniques. For comprehensive structural development and maintaining the tree’s vitality, don’t overlook the importance of Bonsai Pruning for Shape and Health, which works hand-in-hand with wiring to achieve stunning results.
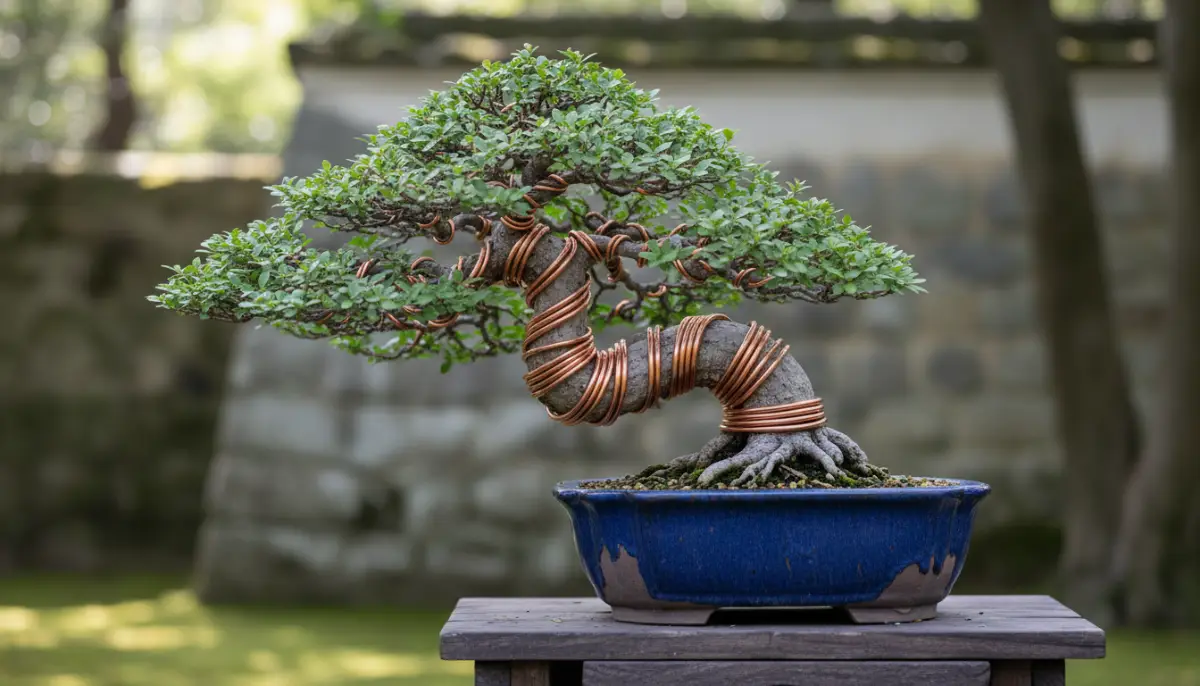
Trunk Wiring and Guy Wires
Continuous learning and sharing experiences are invaluable in the bonsai journey. Engaging with other enthusiasts can provide new perspectives and techniques. Explore the vibrant Bonsai Community & Events to connect with fellow artists and deepen your knowledge.