Wiring & Pruning NZ Natives: Shaping for Optimal Health & Aesthetics
What You Will Learn
Master the art of wiring NZ native bonsai and pruning for optimal health and stunning aesthetics. Learn techniques, materials, and care tips for your unique native collection, including Common Pests of NZ Native Bonsai: Identification & Organic Solutions, and specific solutions for issues like Aphids on Bonsai Treatment.
Embarking on the journey of bonsai with New Zealand native species offers a unique and rewarding challenge. Their distinct growth habits, resilience, and unparalleled beauty make them ideal candidates for this ancient art form. However, successfully shaping and maintaining these precious plants requires a nuanced understanding of their specific needs, particularly when it comes to the intricate processes of wiring NZ native bonsai and meticulous pruning. This comprehensive guide will equip you with the expert knowledge to sculpt your native bonsai for optimal health, stunning aesthetics, and long-term vitality.
From the delicate touch required for supple branches to the strategic cuts that encourage ramification, mastering these techniques will elevate your native bonsai collection. We’ll delve into the right materials, seasonal considerations, and best practices to ensure your efforts result in thriving, artfully composed specimens that celebrate the unique flora of Aotearoa.
Table of Contents
- Fundamentals of Wiring for NZ Species
- Appropriate Wiring Materials & Gauges
- Pruning Techniques for Ramification & Health
- Deciduous vs. Evergreen Native Pruning
- Avoiding Scars & Promoting Healing
- Frequently Asked Questions (FAQ)
Fundamentals of Wiring for NZ Species
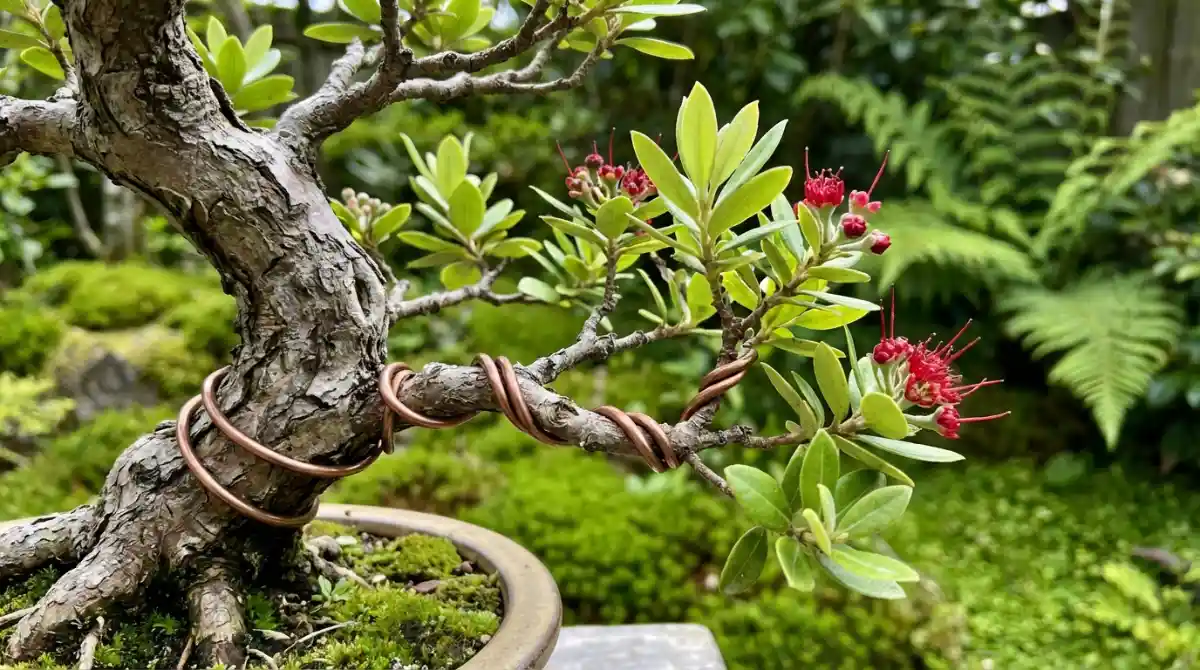
Wiring is a fundamental technique in bonsai, allowing us to gently guide branches and trunks into desired aesthetic forms. For NZ native species, understanding their unique characteristics is paramount. Many natives have softer wood and thinner bark compared to traditional bonsai species, demanding a lighter touch and constant vigilance.
Understanding Native Growth Habits
NZ natives like Pohutukawa (Metrosideros excelsa), Kowhai (Sophora microphylla), and Rimu (Dacrydium cupressinum) exhibit diverse growth patterns. Some, like the Pohutukawa, can be quite vigorous and respond well to wiring, while others, like delicate ferns or small-leafed Coprosmas, require extreme care. Always research your specific species’ growth rate and branch flexibility before you begin. Young, pliable branches are always easier to shape than older, lignified ones.
Timing Your Wiring Efforts
“The best time to wire NZ native bonsai is typically during their active growing season when the branches are most flexible, but also when you can closely monitor for wire bite.”
For most evergreen natives, late spring to early autumn is ideal. This active period is when dedicated Spring Care for Bonsai SH truly makes a difference in guiding their development. For deciduous natives like Kowhai, wiring can also occur during dormancy, but branches will be more brittle. The key is to remove the wire before it bites into the bark, which can happen surprisingly quickly with vigorous growers. Regularly inspect your wired branches – at least once a month – to prevent scarring and ensure healthy growth.
Appropriate Wiring Materials & Gauges
Choosing the right wire is critical for effective and safe wiring. The goal is to hold the branch in place without causing damage. There are two primary types of wire used in bonsai:
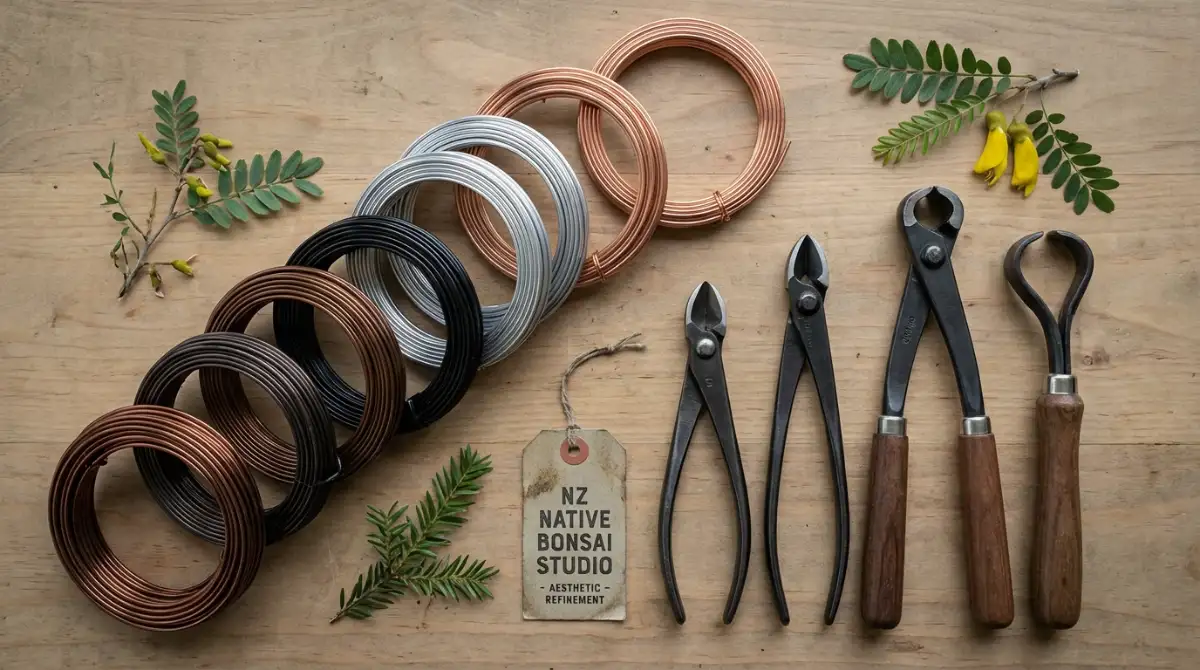
1. Selecting Your Wire Type (Anodized Aluminum vs. Annealed Copper)
- Anodized Aluminum Wire: This is the most common choice for beginners and many experienced artists. It’s softer, easier to apply, and less prone to scarring. It comes in various colours, with a dark brown or black being popular for blending in.
- Annealed Copper Wire: Stronger and holds its shape better than aluminum, copper wire is preferred for thicker, more stubborn branches and for creating more dramatic bends. It oxidizes to a dark brown, blending well with bark. However, it’s harder to work with and can cause more damage if not applied carefully.
2. Choosing the Correct Gauge
The gauge (thickness) of the wire must be appropriate for the branch it’s supporting. A general rule of thumb is that the wire should be approximately 1/3 to 2/3 the thickness of the branch you are wiring. If the wire is too thin, it won’t hold the branch in place; if it’s too thick, it can easily damage the bark.
- Thin Branches (1-3mm): Use 0.8mm to 1.5mm wire.
- Medium Branches (4-8mm): Use 2mm to 3mm wire.
- Thick Branches (9mm+): Use 3.5mm to 5mm wire, or even double wiring with two thinner wires for extra strength.
3. Preparing Your Branches for Wiring
Before you begin, ensure your tree is well-hydrated and healthy. Understanding Watering Bonsai Trees: How Often & How Much is fundamental to native bonsai care, often made easier with specialized tools like Bonsai Watering Cans & Misters: Top Picks. Gently clear any small leaves or shoots that might get in the way of the wire. Plan your design – visualize the final shape you want to achieve. Always anchor your wire securely, either around the trunk or a stronger primary branch, before spiraling it up the branch you intend to shape. The wire should be applied at a 45-degree angle to provide optimal holding power.
Pruning Techniques for Ramification & Health
Pruning goes hand-in-hand with wiring, serving to refine the shape, encourage dense foliage (ramification), and maintain the overall health of your NZ native bonsai. It’s an ongoing process that requires observation and precision. For advanced structural modifications, exploring grafting techniques for bonsai development can also be highly beneficial.
The Art of Reduction Pruning
Reduction pruning involves cutting back overgrown branches or shoots to a desired length. This technique helps maintain the tree’s overall silhouette and directs energy to other parts of the plant. Always cut back to a bud or a smaller branch pointing in the direction you want new growth to occur. For NZ natives, especially those with larger leaves, judicious reduction can lead to smaller leaf size over time.
Promoting Inner Branching (Ramification)
Ramification refers to the development of fine, intricate secondary and tertiary branching, creating a dense canopy. To achieve this, prune back shoots after they have produced several sets of leaves. This encourages the tree to produce new shoots from dormant buds closer to the trunk or primary branches, leading to a more compact and refined structure. Regular tip-pruning during the growing season is essential for most vigorous NZ natives.
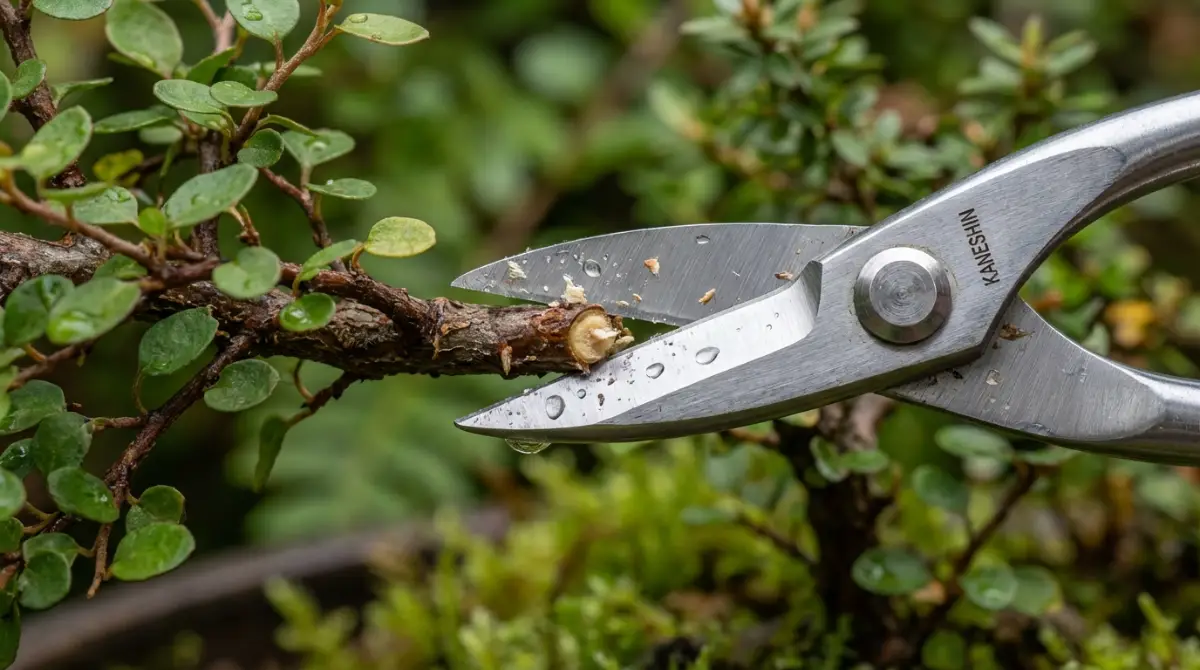
Tool Selection and Sterilization
Use sharp, clean bonsai tools specifically designed for pruning. Sharp tools make clean cuts that heal quickly, minimizing stress on the tree. Sterilize your tools with alcohol or a flame between each tree, and even between major cuts on the same tree, to prevent the spread of diseases.
Deciduous vs. Evergreen Native Pruning
The timing and intensity of pruning differ significantly between deciduous and evergreen NZ native species.
Pruning Evergreen Natives
Most NZ native bonsai are evergreen. These species, such as Rimu, Miro, Totara, and some Coprosmas, are best pruned during their active growing season (late spring to early autumn). Light, regular tip-pruning encourages back-budding and ramification. Heavier structural pruning should also be done during this period to allow the tree to heal quickly and push new growth, avoiding pruning in late autumn or winter, which can lead to dieback.
Pruning Deciduous Natives
Deciduous NZ natives, primarily Kowhai species, lose their leaves in winter. Major structural pruning on Kowhai is best performed during late winter or early spring, just before new buds begin to swell. This allows you to clearly see the branch structure. Light foliar pruning for shape and ramification can be done throughout the growing season, but avoid heavy cuts late in the season that could weaken the tree before dormancy.
Avoiding Scars & Promoting Healing
The goal of bonsai is to create the illusion of age and natural beauty, free from unsightly scars. Proper technique is crucial for achieving this.

Monitoring Wire Placement
This cannot be stressed enough: regularly check your wired branches! As branches thicken, the wire will start to cut into the bark, leaving permanent scars. Remove the wire immediately if you notice it biting in. If the branch hasn’t held its shape, reapply fresh wire or use guy wires. For fast-growing natives, this might mean checking every few weeks during peak growth.
Proper Wire Removal
Never unwind wire from your bonsai, as this can easily strip bark or break branches. Instead, use wire cutters to snip the wire into small, manageable pieces, carefully removing each segment. Work slowly and methodically to prevent any damage to the bark or new growth.
Wound Care and Sealants
For larger cuts, especially those on the main trunk or primary branches, consider using a specialized bonsai cut paste or wound sealant. These products help protect the exposed cambium from disease and desiccation, promoting faster and cleaner healing. Apply the paste immediately after making the cut, ensuring full coverage.
Mastering the art of wiring NZ native bonsai and refining your pruning techniques takes time, patience, and a deep appreciation for these unique plants. By adhering to these guidelines, continuously observing your trees, and practicing with care, you will cultivate stunning native bonsai that are both healthy and aesthetically captivating. If you’re looking to share your passion and deepen your learning, consider starting your own local bonsai study group. Embrace the journey, and watch your living art flourish.
Frequently Asked Questions (FAQ)
- Q: What are the best NZ native species for bonsai wiring?
A: Pohutukawa (Metrosideros excelsa), Rimu (Dacrydium cupressinum), and Totara (Podocarpus totara) are excellent for wiring due to their natural structure and ability to develop fine ramification. Kowhai (Sophora microphylla) is also popular for its beautiful flowers, though its deciduous nature requires different timing. - Q: How long should I leave wire on my NZ native bonsai?
A: The duration varies greatly depending on the species, branch thickness, and growth rate. For vigorous native growers, wire may need to be removed in as little as 4-8 weeks to prevent scarring. Always monitor weekly during the growing season and remove the wire as soon as it begins to bite into the bark, or the branch holds its new position. - Q: Can I wire old, thick branches on my native bonsai?
A: While it’s possible, wiring older, thicker, or lignified branches carries a higher risk of snapping or damaging the branch. It’s generally safer and more effective to shape younger, more flexible growth. For very thick branches, consider using guy wires or gradual bending techniques over several seasons rather than aggressive wiring. - Q: Is it better to use aluminum or copper wire for NZ natives?
A: For most NZ natives, especially for beginners, anodized aluminum wire is recommended due to its softness and ease of application, reducing the risk of damage. Annealed copper wire is stronger and holds better for stubborn, thicker branches, but requires more skill and vigilance. - Q: What is the most common mistake when wiring native bonsai?
A: The most common mistake is leaving the wire on for too long, leading to unsightly scars (wire bite). Another frequent error is using wire that is too thin, which doesn’t hold the branch, or applying wire too loosely, which also fails to achieve the desired shape.