Pruning, Shaping & Repotting Indoor Bonsai in NZ
Master indoor bonsai pruning, shaping, and repotting in NZ with our comprehensive guide. Learn essential techniques for a healthy, beautiful miniature tree.

bonzai.co.nz
What You Will Learn
Master indoor bonsai pruning, shaping, and repotting in NZ with our comprehensive guide. Learn essential techniques for a healthy, beautiful miniature tree.
Pruning, Shaping & Repotting Indoor Bonsai in NZ: Your Ultimate Guide
Caring for an indoor bonsai is a journey of artistry and patience, a living sculpture that brings a piece of nature’s majesty into your home. In New Zealand’s unique climate, understanding the nuances of an indoor bonsai pruning guide, shaping, and repotting is paramount to your tree’s health and aesthetic appeal. This comprehensive guide will equip you with the expert knowledge to nurture your miniature tree, ensuring it thrives with vitality and elegance.
Whether you’re a seasoned enthusiast or just starting your bonsai adventure, mastering these fundamental techniques is key to developing a strong, healthy, and beautifully formed indoor bonsai. Let’s delve into the essential practices that will transform your tree into a living masterpiece.
Table of Contents
- The Importance of Regular Pruning for Bonsai Health
- Basic Pruning Techniques: Pinching, Trimming, Defoliation
- Wiring & Shaping Your Indoor Bonsai
- When and How to Repot Your Bonsai in NZ
- Choosing the Right Soil Mix and Drainage
- Bonsai Care Action Checklist
- Frequently Asked Questions (FAQ)
- References & Further Reading
The Importance of Regular Pruning for Bonsai Health
Pruning is the cornerstone of bonsai cultivation. It’s not just about aesthetics; it’s a vital horticultural practice that ensures the longevity and vitality of your indoor tree. Regular pruning helps to maintain the miniature size, encourage dense ramification (branching), and remove unhealthy or unwanted growth. Without it, your bonsai would quickly revert to its natural, larger form, losing its distinctive shape and balance.
“Pruning shapes the tree, but more importantly, it shapes its destiny. A well-pruned bonsai is a reflection of careful attention and deep understanding.”
For indoor bonsai in New Zealand, consistent pruning also improves air circulation within the canopy, reducing the risk of fungal diseases common in humid indoor environments. It stimulates new growth, helping your tree to recover from stress and maintaining its vigour throughout the year.
Basic Pruning Techniques: Pinching, Trimming, Defoliation
An effective indoor bonsai pruning guide incorporates several techniques, each with a specific purpose. Mastering these will give you control over your tree’s growth and form.
1. Pinching & Bud Pruning
Pinching involves removing new shoots or buds with your fingertips or small concave cutters. This is crucial for maintaining the tree’s overall shape and promoting finer branching.
- Identify New Growth: Look for fresh shoots extending beyond the desired canopy outline.
- Pinch Back: Using your thumb and forefinger (or small shears), remove the growing tip, leaving one or two sets of leaves behind. This encourages side branches to develop.
- Frequency: Perform this regularly during the growing season (spring and summer in NZ).
2. Trimming & Structural Pruning
Trimming involves cutting back branches with shears or scissors to refine the tree’s silhouette and remove unwanted growth. Structural pruning is more drastic, involving the removal of larger branches to establish the primary form.
- Observe Shape: Step back and assess the overall form. Identify branches that detract from the desired design, cross other branches, or grow downwards.
- Make Clean Cuts: Use sharp bonsai shears to make clean, angled cuts close to the trunk or parent branch. Avoid leaving stubs.
- Consider Balance: Aim for visual balance and an open canopy. Remove weak, diseased, or dead branches immediately.
3. Defoliation (Partial or Full)
Defoliation, the selective removal of leaves, is an advanced technique used to encourage smaller leaves and promote back-budding. It should only be done on healthy, vigorous trees.
- Timing: Best performed in late spring or early summer, after the first flush of growth has hardened.
- Method: Carefully remove all or most of the leaves from a branch or the entire tree using defoliating scissors, leaving the petioles (leaf stems) intact.
- Caution: Not all indoor species tolerate defoliation well. Research your specific tree species before attempting. Ensure the tree is well-watered and fed beforehand.
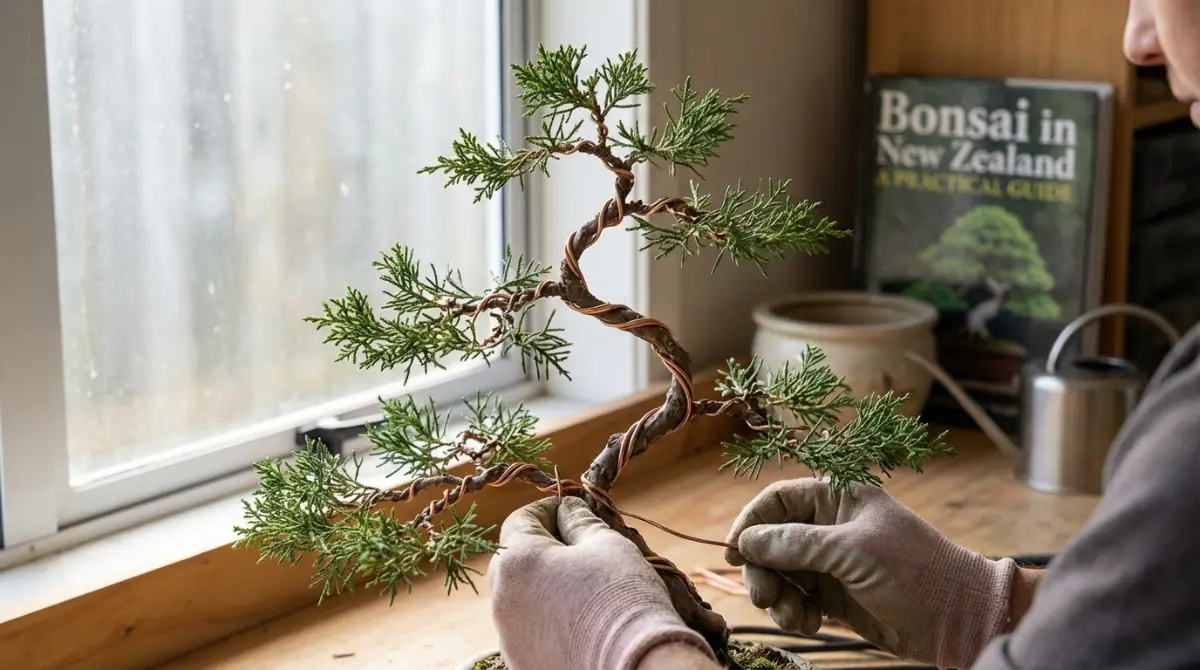
Wiring & Shaping Your Indoor Bonsai
Wiring allows you to guide the growth direction of branches and the trunk, creating the dynamic lines and movement characteristic of bonsai. It’s a precise technique that requires patience and care.
1. Choosing the Right Wire
Use anodised aluminium or annealed copper wire, specifically designed for bonsai. Choose a thickness that is strong enough to hold the branch in place but not so thick that it damages the bark.
2. Applying the Wire Safely
- Anchor the Wire: Start by anchoring the wire securely around the trunk or a stronger branch, ensuring it doesn’t girdle the bark.
- Wrap at 45 Degrees: Wrap the wire around the branch at a 45-degree angle. This provides maximum holding power and reduces the risk of cutting into the bark.
- Even Tension: Apply even tension as you wrap, keeping the wire snug but not overly tight.
- Bend Slowly: Once wired, gently bend the branch into the desired position. Support the branch with one hand while bending with the other to prevent snapping.
3. Monitoring and Removal
Monitor wired branches closely. As the tree grows, the wire can cut into the bark, causing permanent scars. In New Zealand’s growing conditions, wires may need to be removed sooner than in colder climates.
- Check Regularly: Inspect the wires weekly, especially during periods of active growth.
- Remove Promptly: When the branch holds its new shape, or if the wire starts to bite into the bark, remove it carefully with wire cutters. Cut each coil individually; do not unwrap.
When and How to Repot Your Bonsai in NZ
Repotting is essential for renewing the soil, stimulating root growth, and maintaining the tree’s health within its confined pot. Over time, soil breaks down, drainage diminishes, and roots become pot-bound, starving the tree of nutrients and water.
1. Signs Your Bonsai Needs Repotting
- Roots Emerging: Roots are growing out of the drainage holes or pushing the tree upwards.
- Slow Drainage: Water takes a long time to drain, indicating compacted or degraded soil.
- Reduced Vigour: The tree shows stunted growth, yellowing leaves, or general decline despite proper care.
- Pot-bound: When removed, the root ball is a dense, solid mass of roots.
2. Timing for Repotting in New Zealand
The best time to repot most indoor bonsai in NZ is in late winter to early spring, just before the first flush of new growth. This allows the tree to recover quickly as it enters its active growth phase. Specific timings may vary slightly by species, so always research your individual tree.
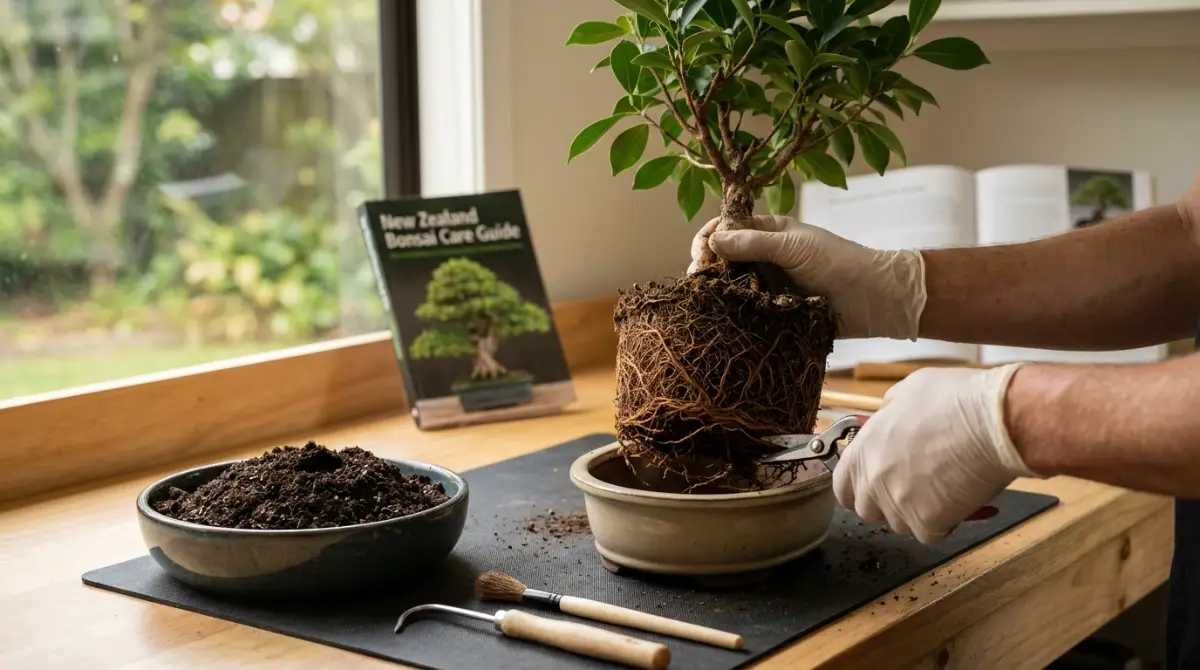
3. Step-by-Step Repotting Process
- Preparation: Gather your tools: root hook, shears, new soil mix, drainage mesh, and a slightly larger (or same size) pot if desired.
- Remove the Tree: Gently lift the tree from its pot. If it’s stuck, use a thin knife around the edges.
- Root Pruning: Use a root hook to carefully tease out old soil and untangle roots. Prune away 1/3 to 1/2 of the outer and bottom roots, removing any thick, circling, or dead roots. Aim for a radial root system.
- Prepare the Pot: Place drainage mesh over the drainage holes and secure it with wire. Add a thin layer of fresh soil mix.
- Position the Tree: Place the tree in the pot, adjusting its position for optimal aesthetic balance. Ensure the nebari (surface roots) are visible and pleasing.
- Add New Soil: Carefully work new soil around the roots, using a chopstick or similar tool to ensure no air pockets remain. Gently tap the pot to settle the soil.
- Water Thoroughly: Water until water drains freely from the bottom. Place the tree in a protected, shaded spot for a few weeks to recover.
Choosing the Right Soil Mix and Drainage
The right soil mix is paramount for bonsai health, as it provides both anchorage and the necessary balance of air, water, and nutrients. For indoor bonsai, excellent drainage is critical to prevent root rot, which is often a killer of indoor plants.
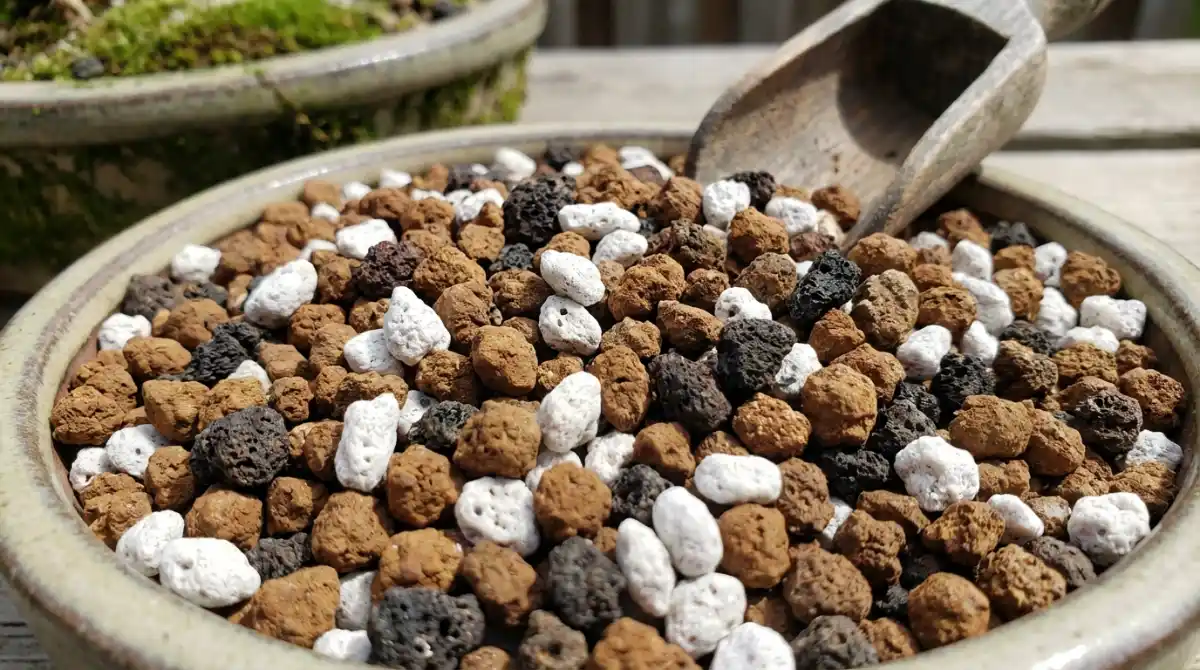
Key Components of a Quality Bonsai Soil Mix:
- Akadama: A hard-baked clay granular soil from Japan, excellent for water retention while providing good aeration. It changes colour when wet, indicating watering needs.
- Pumice: A lightweight, porous volcanic rock that offers superb drainage and aeration, preventing compaction.
- Lava Rock: Provides excellent aeration and drainage, and its irregular shape helps prevent soil compaction. It’s heavier than pumice, adding stability.
- Organic Matter: A small percentage (e.g., pine bark fines or coco coir) can be added for nutrient retention, but keep it minimal to avoid excessive moisture.
A typical mix for many indoor species might be 50% Akadama, 25% Pumice, and 25% Lava Rock. Adjust these ratios based on your specific tree’s needs and your local climate. For instance, in a humid NZ environment, you might lean towards a slightly coarser, faster-draining mix.
Bonsai Care Action Checklist
Keep your indoor bonsai thriving with this quick reference checklist:
- Regularly inspect your bonsai for new growth, pests, or diseases.
- Pinch back new shoots frequently during the growing season to maintain shape.
- Trim branches that are out of place or excessively long.
- Wire branches carefully to refine your tree’s form, removing wires before they bite into the bark.
- Repot every 2-3 years (or as needed) in late winter/early spring in NZ.
- Use a well-draining soil mix tailored to your bonsai species.
- Water thoroughly when the topsoil feels dry, allowing water to drain completely.
- Fertilise regularly during the growing season with a balanced liquid fertiliser.
- Provide adequate light, ideally near a bright, indirect light source or with supplemental grow lights.
Frequently Asked Questions (FAQ)
How often should I prune my indoor bonsai?
The frequency depends on the species and its growth rate. Generally, pinching new growth can be done weekly or bi-weekly during the active growing season (spring and summer). Structural pruning is typically done once or twice a year, usually in late winter or early spring.
What are the best tools for indoor bonsai pruning?
Essential tools include small, sharp pruning shears for leaves and small branches, concave cutters for larger branches (to promote faster healing), and wire cutters for removing wire safely. Always ensure your tools are clean and sharp to prevent damage and disease.
Can I use regular potting soil for my indoor bonsai?
No, regular potting soil is generally unsuitable for bonsai. It retains too much moisture, lacks proper aeration, and compacts easily, leading to root rot. Bonsai require a fast-draining, aerated soil mix composed of inorganic components like akadama, pumice, and lava rock.
What if I accidentally cut off too much when pruning?
Mistakes happen! If you cut too much, don’t panic. The tree will likely recover, though it might take time. Focus on providing excellent general care (watering, light, humidity) and allow the tree to naturally send out new shoots. Avoid further drastic pruning until it has fully recovered.
References & Further Reading
- The New Zealand Bonsai Association. (Ongoing). Bonsai Care Guides for NZ Conditions.
- Adams, P. (2012). Bonsai: The Complete Guide to Art and Cultivation. Quarto Publishing Group.
- Koreshoff, D. (1984). Bonsai: Its Art, Science, History and Philosophy. Timber Press.
- National Bonsai Foundation. (Online Resource). Horticultural Practices & Techniques.